
Step One: Go to your Google Plus Page
Once you have a Google Plus account, you can reach it simply by typing google.com into your web browser and then clicking Enter on your keyboard to go to the website.
There, you will see some links in the upper right corner above the Google Search box.
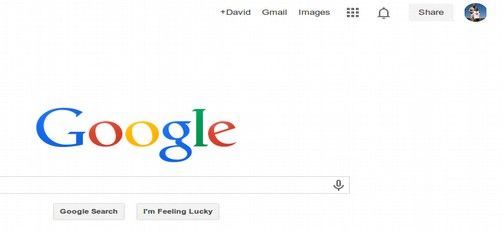
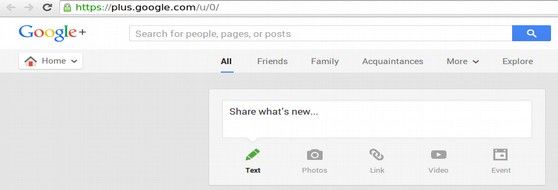
To reach your Google Plus Page, click on Plus (Your Name). This will take you to your Google Plus Home Page. You can also access this page by logging into your Gmail account and clicking on Plus (Your Name) at the top of that page. Here is what your Google Plus Home page will look like.
Step 2: Go to your Google Hangouts Page
To start a video conference call, first click on the Home Icon in the upper left corner.
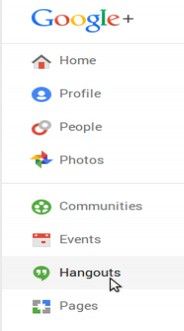
This will bring up several options. Click on Hangouts to go to your Hangouts page where you can start a new video conference. You will see this page.
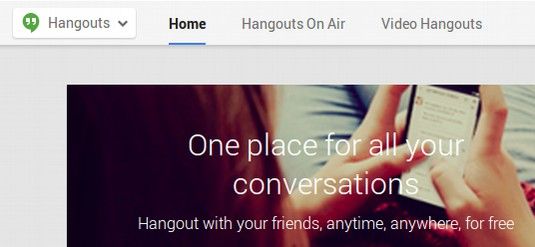
Step Three: Click on the Video Hangouts link at the top right part of the Hangouts page
Google offers two different kinds of free video conferencing. The simple non-recorded version is called Video Hangouts. This allows you to video conference with one to ten people without having the conference recorded and posted to your YouTube channel. A more complex version of Google Video Conferencing is called Hangouts On Air (which Google also called HOA). Hangouts on Air are recorded and posted to your YouTube account. In this article, we will cover how to conduct a simple Video Hangout with just one other person. In the next article, we will review how to conduct a more complex Hangout on Air with more than one person. To start a Video Hangout from your Hangouts page, click on Video Hangouts.
Step Four: Click on Start a video Hangout.
On the Video Hangouts page, click on Start a Video Hangout.

If it is your first hangout, you will see a link to a plugin you need to install. After the plugin is installed, the video conference will start (assuming you have your computer's video camera connected and turned on). You can click on the blue button at the bottom of the screen to Invite people to your conference.
Step Five... Type an Email Address into the Observers Invitation page
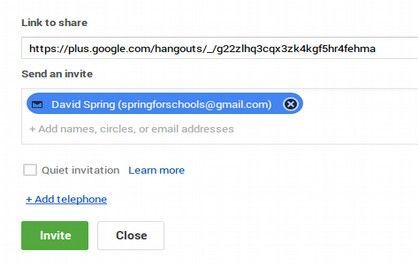
We are now at the Hangouts Invitation screen. This shows a link to our new video conference hangout which we could just copy and email to people to watch the hangout. But instead, we will learn the official way to invite a single person to a hangout conference call.
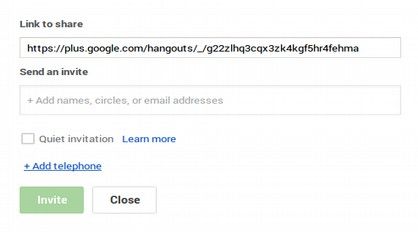
We can invite one or more people to watch our video conference. There are several ways to invite people to a video conference. We will later learn how to create a Google Circle to invite a group of people with just the click of a button. But here we will invite people by typing in their complete Gmail email address. Be aware that you can also type in their name and some image options will appear on the screen. You may be tempted to just click on the person's image. But because people may have several email addresses, it is better to simply type in their complete Gmail email address.
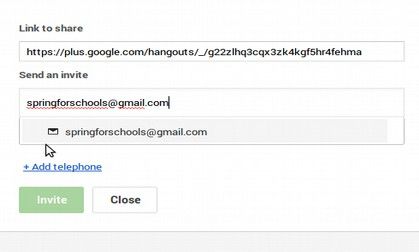
Step Six: Click on the Envelope Icon to Select the Email Address
Notice the small arrow pointing at a very small envelope in the previous image. Click on this envelope to select and highlight the email address.
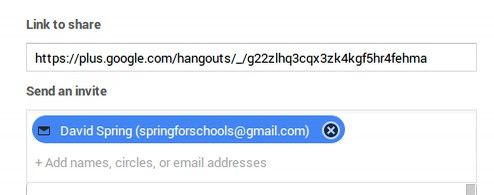
Step Seven: Bring up the Invite Button
We could add another person's Gmail address and select it also. But here we will simple get the Green Invite button to appear by clicking on the white space to the right of “Link to Share.”
Understand that this first invitation screen only invites folks to watch the video – not participate in it. When you click the Green Invite button, you will be taken to a video conference screen. If your computer camera is properly set, you will see your camera light turn on and see your face on your computer screen. The first thing you may notice is that your face is somewhat dark and shadowed. The best way to fix this is to get a small desk lamp and place it right next to your laptop to shine some light on your face. It also helps to have a neutral background as viewers will also see what is behind you. So move your desk and or laptop so that there is a neutral wall or curtain behind you. Also if your computer fan makes a loud humming sound, consider using a headset with separate earphones and audio connection. Finally, if you are practicing with another person in your home, you should have your computers in different rooms to prevent audio feedback problems.
At the bottom of the screen, you will see a blue Invite More button where you can invite people to actually participate in the video conference rather than just observe it.
Step Eight: Invite Folks to Participate in the Video Conference
At the top of the screen, you will see several icons. To get the icons to appear, hover over the screen with your mouse pointer.

Click on the Invite People icon on the top (or bottom) of the screen. This will bring up an Invite screen that looks identical to the one we used earlier. The prior invite screen was just for inviting observers This is the real invite screen to invite folks to participate in the video conference. Type in the person's complete Gmail address, click on the envelope to highlight their address, click in the white space to bring up the green Invite button and click on the Invite button. The person you are inviting will receive an invitation in their Google Plus page and on their Gmail Inbox page - and likely hear a beeping sound on their computer.
Step Nine: Wait for your Friend to Answer the Call
Invited participants can go to their Google Plus and/or Gmail page and they will see the following invitation.
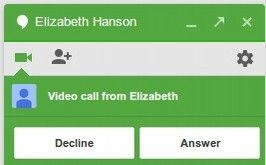
To begin the video conference, just click on Answer.
Step Ten: Practice using Google Hangouts
You can practice using the tools available with Google Hangouts even without a friend on the other end of the call (or if they do not respond to your invitation). When you start a Google Hangout, after exiting the Invitation screen, there will be several tools you can practice using. To see these tools, move your mouse pointer over the screen. At the top of your screen are six icons. The first allows you to invite more people. The second allows you to turn off the sound. The third allows you to turn off the camera and replace it with your Gmail icon. The fourth allows you to change the bandwidth if you are having trouble with your internet connection. The fifth allows you to set you to change which camera, microphone and speakers you are using. The final one (the red phone) is what you click on to end the call.
There are also a bunch of buttons on the left side of the screen. The first icon is a pencil that brings up a drawing tool. It is pretty distracting so we will skip it. The second icon is a blue box called Chat. Click on this button to bring up a panel on the right side of the Hangout Window. To use Chat, type a comment in the box at the bottom of the Chat panel and then press Enter on your keyboard. To hide the Chat panel, click on the X in the upper right corner of the panel.
Practice Using Screenshare
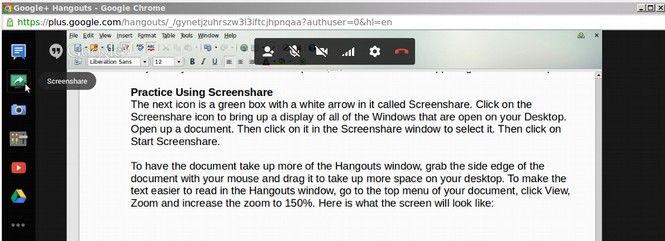
The next icon is a green box with a white arrow in it called Screenshare. Click on the Screenshare icon to bring up a display of all of the Windows that are open on your Desktop. Open up a document or slide presentation. Then click on the document in the Screenshare window to select it. Then click on Start Screenshare.
To have the document take up more of the Hangouts window, grab the side edge of the document with your mouse and drag it to take up more space on your desktop. To make the text easier to read in the Hangouts window, go to the top menu of your document, click View, Zoom and increase the zoom to 150%. Here is what the screen will look like:
In a later article, we will explain in more detail about how to create a video using the Google Hangouts Screen Share tool.
The next icon, a blue box with a camera it, is called Capture. Click on it to see the following:

This will bring up a small photo icon at the bottom of the screen. Click on this to take a photo of your screen. This will place a small image at the lower right corner of your Hangouts window. Take a couple of images and then click on these photos. This will bring up a panel on the right side of the Hangouts window.
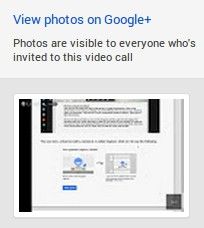
Click on View Photos on Google+ to view the photos in a separate window in your Google Chrome browser. At this screen, you can download the photo to your computer and/or share it with it with a circle of friends on your Google+ page. To hide the side panel, click on the lower right image again. To hide the camera, click on the blue camera in the left side menu again.
The next icon is called Control Room. This icon does not work in Google Hangouts but will work very well in Hangouts on Air. So we will explain how to use this tool in our next article.
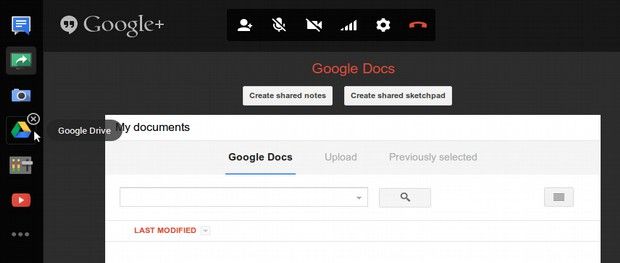
The next icon, a red box, can take you to YouTube where you can play a video for the team to watch. Below this is a multicolored triangle that when clicked on takes you to Google Drive – a subject that deserves it own article. Click on it to go to your Google Drive page where you can open any documents you have created with Google Docs or any documents or slideshows you or anyone else has loaded into your Google Drive storage area.
Add the Google Hangouts Lower Thirds Title Creation Application
Click on the three dots at the bottom of the left side menu to bring up a panel showing all of your added applications. The only one currently listed is the drawing application. But there are a few more you can add by clicking on Add Apps. Some of the ones worth adding include:
Remote Desktop: Allows you to help a friend work on their computer (with their permission).
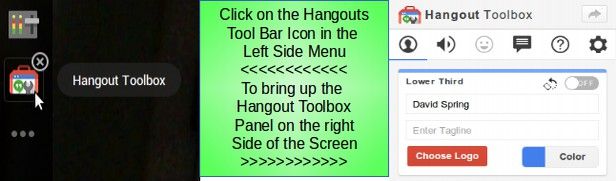
Hangouts Toolbox: Adds several tools including the Lower Third Title Creator. Just click on Hangouts Toolbox to select it. Then click Install Hangouts Extension and then click Accept. This will place the Hangouts Toolbox in the left side menu and open it in the right panel of your Hangouts window. Click on the Circle Icon with the person in it to bring up this screen:
Below is a graphic on how to use this free tool to create custom Titles and add graphic presets to any part of the Hangouts screen that you can turn on or off any time during the video.
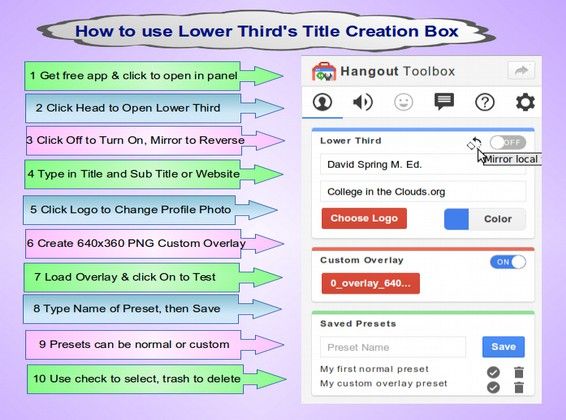
The main benefit of the Lower Third application is that it can place the names of the Hangout Participants under their image so that a new person joining the video conference call – or someone watching the video later on YouTube if it is a Hangouts On Air- can know who all of the people are and who the person is who is speaking. You can add a tag line and change the profile logo that appears to the left of your name, but these are not necessary.
Change the Off button to On to turn on your Title. Your name and Tagline will now appear below your image when you are on Google Hangouts. The settings wheel allows you to Auto Load the last used Lower Third whenever you are on Google Hangouts. Then hide this application by clicking on the Toolbox icon in the left side menu. Here is what the default Title looks like:
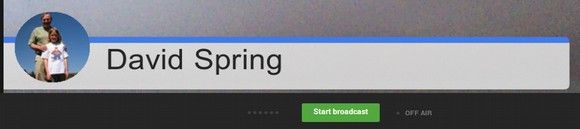
Here is the default title after adding a sub-title and changing the bar color to green.
These basic options are good enough for most folks. But if you really want to make an impact, Lower Thirds gives you an easy way to add special graphics to any part of the screen at any time. It is called Custom Overlays.
How to Create a Lower Thirds Custom Overlay Image
You can place a partially transparent graphic image anywhere on the screen by creating a custom overlay PNG image and then loading it into the Custom Overlay Section of your Lower Thirds tool. You then need to give this preset a title and save it to have it appear in your list of presets. To have it appear, click on the Preset checkmark and then turn on the custom overlay. To create an additional custom overlay, simply replace the first overlay image with another one. All images must be 640 pixels wide x 360 pixels tall and all must eventually be saved as PNG images in order for the transparency to work correctly.
You can use a free tool called Libre Office Draw to set up this image. Open a new Libre Draw document and in the top menu, click on Format, Page. Set the Page display to Landscape and the Page margins to one inch on the right and left and 1.25 inches on the top and bottom. Then click Save.
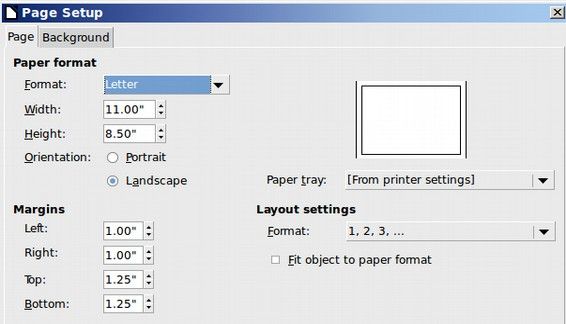
This will create a page that is 9 inches wide and 6 inches tall.
Next, click on View in the top menu, turn on the ruler and set Grid for Display grid. The following grid boxes will be displayed in your Libre Draw document.
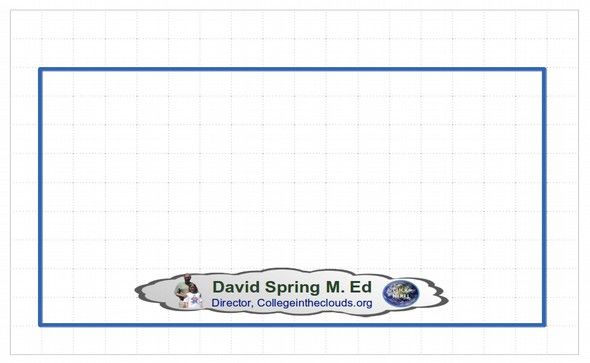
Each grid box is one half inch. Because the goal is to have a final image that is exactly 640 x 360 pixels, the ratio of the image should be 16 x 9 or 8 by 4 ½ inches. The 8 inch width is achieved by inseting our blue box 2 grid boxes from the Page width. The 4 ½ inch height is achieved by inseting the blue box 3 grid boxes from the Page height. Creating the blue box with no fill will simulate what the Hangout Viewing screen will look like.
The above custom title was made by first creating three transparent PNG images – a photo, a logo and a cloud background image. The transparent backgrounds of all three images were created using a free program called Pinta. The images were then copied from the file manager, pasted into the Libre Draw document and then reduced to fit centered in a space that was less than one inch (two boxes) tall and five inches (ten boxes) wide.
We then added the Name, Title and Website using Libre Draw Text boxes with the fill and borders set for none. The cloud was placed behind everything else by selecting it, right clicking on it and selecting Arrange, Send to Back.
Then turn off the blue perimeter box and the grid boxes and capture the image with a free tool called Shutter – making sure to get more of the image than you actually need. Use the ruler to go from above the one inch mark at the top left to below the 5 ½ inch mark at the bottom right when capturing the image. Shutter gives images a very large file size. To reduce the file size, paste the image from shutter into a Libre Writer document. Then right click on the image and select compress. Then right click on it again and save it to a folder in your file manager as a JPG. Then precisely resize and crop the JPG image to 640 x 360 pixels using a free image editing tool called Fotoxx. One the image is the correct size, using Fotoxx to save it as a PNG image.
Then open the PNG image in Pinta and use that tool to change the white background to transparent. Then create a new “test” Hangout on Air and while still in the Green Room (not yet broadcasting) click on Hangout Toolbox to bring up the Lower Thirds panel and add the PNG overlay image to the custom overlay section of Lower Thirds. Be sure to give it a name and save it as a Preset. To see how the custom title looks when viewed by others, click on the Mirror Local icon near the top of the Lower Thirds panel (just to the left of the Lower Thirds On/Off button) to reverse the graphic so it is readable.
Change the Google Hangouts screen size and position
If you want to work on a document during the video conference, you can move the Hangout Window by grabbing it at the top with your mouse point. You can reduce the size of the window by grabbing it at the side with your mouse pointer and dragging the side border in. You can have the window take up the full space of your computer monitor by clicking on the Maximize Window box at the upper right corner of the Hangouts Window. Click on it again to get out of full screen mode.
Properly End the Video Conference
To end the video conference, all participants should click on the red phone icon at the top of the video screen.
Congratulations! You are now an expert at making a simple Google Hangouts Conference call! Practice these simple steps with a friend and within minutes both of you will be experts on how to place a simple video conference call with Google Hangouts. In the next article, we will review how to conduct a Hangouts on Air video conference call.