
Why Post a Conference Video to YouTube?
It is common to think that if you have one hundred people in your group, you need to set up a video conference call to invite all one hundred people to the meeting. Folks therefore dismiss Google Hangouts as an option because Google limits the number of participants to ten people (a limit that can be raised to 15 by clicking on a few buttons to get a free Google Apps EDU account). But the reality is that it is difficult to conduct or even watch an efficient meeting where more than ten people are presenting. A far better process is to have ten experts, guests or team leaders participate on a video conference “panel” with the person who arranged the video call acting as the host, moderator or facilitator of the video conference call. The rest of the group – including millions of people - can watch this conference call on YouTube or on your website if you have one. Viewers can also email in questions for the panel and/or post questions and comments on a social media page or website forum page.
The best option to display your conference video is a website forum page where the questions and comments can automatically be organized by topic for later viewing by those who were not able to listen to the conference live. The video(s) can even be posted or embedded on several websites – each belonging to a different division of the bigger group and each ran by local leaders. This way a million people can be involved and local relationships can be build within local communities even when discussing a national event.
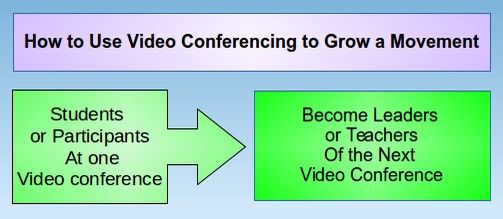
After the main video conference, each of the ten team leaders who participated as guests in the national call can turn into hosts and set up their own video conferences with up to ten more guests – either taped and posted to YouTube with Hangouts on Air – or through a simple Google Hangouts video conference which is not taped and therefore may allow more open discussion of ideas and/or problems. Then each of these regional video conference guests can host their own video conferences with ten people in their local community.
This model can be expanded to create a national movement. Arranging several smaller conferences is a much better way to share information than to try to hold a video conference with 100 people all at the same video conference. For example, if you hold a 60 minute video conference with 10 participants, each participant will have 3 minutes to present their ideas and another 3 minutes to provide feedback on the ideas of others. If there were 60 people at the same one hour meeting, each person would only have 30 seconds to present their ideas and 30 seconds to provide feedback for the ideas of others. So rather than the Google Hangouts Limit of ten people per conference being a drawback, it is actually a major advantage.

When you combine the power of team meetings with the fact that Google Hangouts is free, it may be that Google Hangouts is the most powerful social organizing tool that has ever been invented. So it is worth taking the time to learn how to use this free tool.
Special Preparations for a Hangout On Air Video
A normal, non-recorded video conference has a very low threshold of preparation. If you or a guest is interrupted by noise or other distractions, it is no big deal. But a Hangout On Air video is basically a live broadcast that may be viewed by a million people. Both the host and the guests should take the time to locate a quiet room with high speed internet access where they will not be interrupted during the video. Also if you or a guest has a noisy computer fan, it is best to get a separate microphone to use during the video recording. This is why it is good to have a normal non-recorded video conference with each guest for a few minutes a few days before the real event so that you can be assured yourself that they have a computer that will not present a problem during the recorded video. Finally, if you will be adding either a video or graphic trailer to your recording, this should be created well before conducting the actual recording.
What does a Live Hangout on Air Look Like?
To see other live Hangouts on Air, from your Google Plus Home page, click on the Hangouts link in your side menu. This will take you to your Hangouts Page. Then at the top of the page, click Hangouts On Air.

This will take you to a page with lots of live and previous hangouts being shared with the public. At the top of this page is a button called Start a Hangout On Air. Click on this button to practice creating your own Hangout on Air. This will bring up an Invitation screen where you can invite folks to observe the Hangout on Air live. Recall that the first invitation screen is only for observers. Later, there will be a second invitation screen to invite the actual video conference panel of participants.
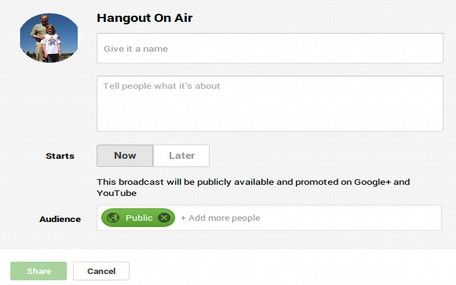
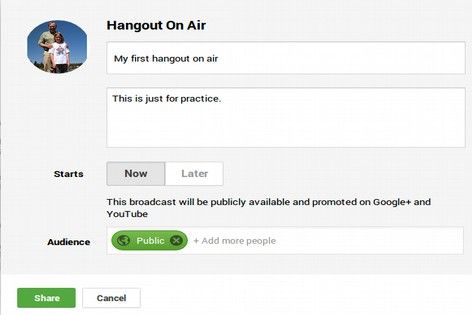
Here you can schedule a Hangout On Air to start now (if you want to practice) or Later (if it is a real event). Give the Hangout On Air a name and brief description and invite friends to watch it.
If this was a real Hangout on Air, you would likely leave the green Public button to invite everyone to watch the video. However, since for now we are just practicing, delete the green Public button as we do not want to share our practice video with the public. Instead, click on the white Audience box to bring up some options. Then, choose a Circle with no one in it. Later we can pick a much larger audience to share our real videos with. Then to start practicing with the Hangout On Air, click Share.
When you click on Share, even if you will be starting the video conference now rather than later, Google will create a special “Events” page just for this video and take you directly to this events page.
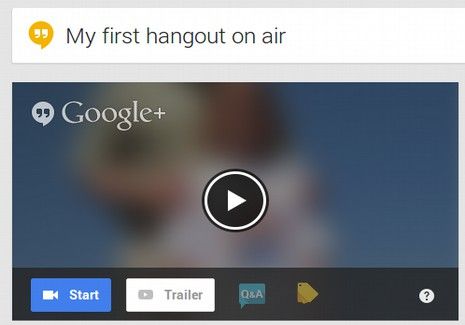
If this were a real event, we could add a trailer video clip and or a trailer image. We could also create a theme for the video that will show on the event page. To see what this looks like, click on Trailer. It goes to a YouTube page where you can enter a URL for your trailer clip.
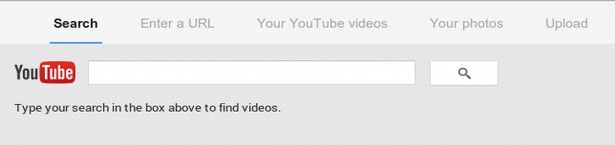
You can enter the URL of your trailer clip, search for your trailer clip, go to your videos to look for it. If you make a video trailer, it is useful if it has a link to your YouTube channel where folks can see all of your past videos.
If you do not have a trailer video yet, you can still click on the Your Photos link to place a promotional photo in video window. The ideal size for a trailer image is 1280×720. But there is a cropping tool so almost any large image will do. These are all important if we are making a video we want to promote. But since we do not want to promote our practice video and since we have not made a trailer clip or image, click Cancel.
Add a Theme to your Event
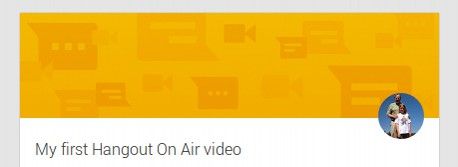
Then click on the title of your video to go back to the Events page for your video. If you click on “Your Events” at the top of this page, you will see how your event is posted when shared with others. It has a very ugly orange banner at the top of the event.
To fix this problem, click on the name of the video to go back to its Event page.

Just to the right of the title of the video is a tiny button called “Edit Event.” Click on it.
This screen will appear.
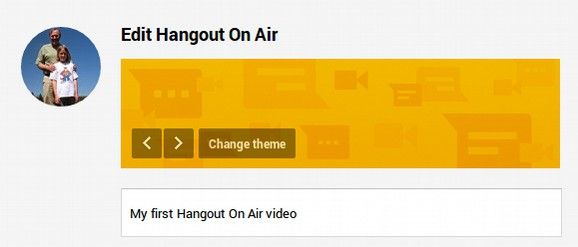
You can fix the mis-spelled title here. But what we really want is to click on Change theme.
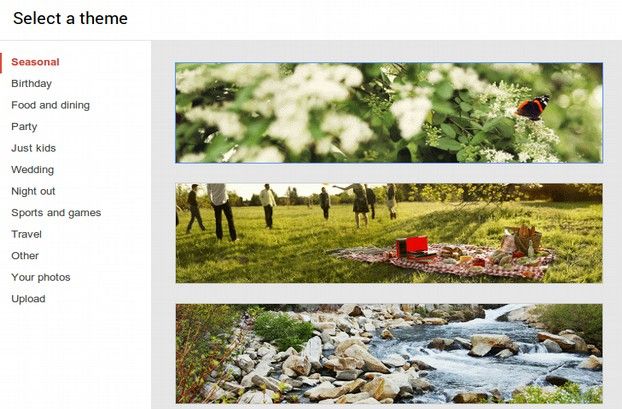
There are lots of cool themes here. You can also load your own theme. The image size should be 1200×300 for a theme image. Click on the stream shown just above. Then click Set as Theme. Then click Save. You will now see an amazing running stream just above your practice video and at the top of your Event page for this video.
Three Different Ways to Promote your Video
Imagine you have scheduled a Hangout On Air event to take place the first Tuesday of next month at 7 pm. Go to the Google Events page for this video and to the right of it, you will see an information box.
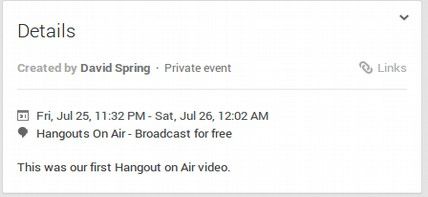
You can click on the small arrow to the right of the word Details to bring up a list of options.
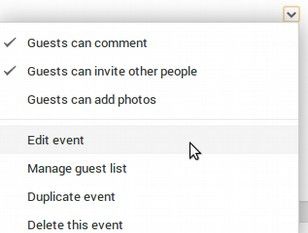
If this was a practice event, you can delete the event here or edit the event. Underneath this arrow in the Details box is the word LINKS. You can click on “Links” to bring up the link to your Hangout on Air Video. Three different links will be displayed.
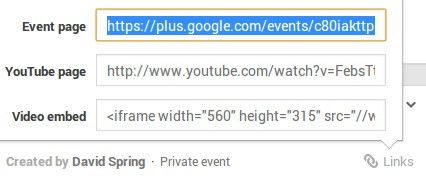
If you want to send observers to your Google Plus Events page for this video, then copy the first link and use that link to promote the event. If you would rather encourage users to watch the event on YouTube, then use the second link. However, as we explain elsewhere, it is generally best to post an embedded link to the video on your website. Therefore, if you are going to use this option, then copy the Video Embed code for this video and paste that into your website. With Joomla, this embed code can be pasted into the HTML code for any article. To see the article, you also need to create a menu item for it. You can also create a special HTML module for the video and paste the embed code into the module. You can then assign the module to any position on any page that has a published menu item. For more on this, see our website for building a Joomla website called buildyourownbusinesswebsite.org.
Another benefit of having folks watch the video on your website is that there are fewer distractions on your website than on Google or YouTube. Google and YouTube both post images and ads to content you have no control over. A person may see an ad while they are watching your video on YouTube and then they might get distracted, leave your video and never come back. Post the video on your website and you get to control what the viewer sees when they are watching the conference call – not Google.
A final benefit of encouraging folks to watch the video on your website rather than your Google Plus event page or your YouTube video page is that you can create a special page on your website for your video and then attach all kinds of additional information to this same page. For example, you can include links to reference articles. You can include a link to a PDF of a handout or even a whole book related to the video that the viewer can download. You can include a slideshow presentation that can be downloaded and most important, if the viewer is already on your website, they are more likely to click on the link to join your website's email list.
What happens to the video on the Video Events Page?
You may wonder what happens to the video if a person visits the Events page before the video has started and tries to click on the Start arrow. The answer is that, if there is a trailer video clip, the visitor will see the trailer. If there is a trailer image, after the video clip is done, the visitor will see the trailer image with a countdown showing the amount of time until the main video starts. This is assuming we are talking about a Hangout On Air event scheduled for some time in the future. If there is no trailer image, the visitor will just see the countdown timer. If the person clicks on the Start arrow while the video is being broadcast live, they will see the live portion of the video. If they go to the Event page after the live show is over, they will see the complete recorded version of the show. One important reason to get all of your friends and viewers into special Google Circles is that when you invite a particular circle, everyone in that circle will receive a couple of reminders of the event – including a reminder to go to the event page just before the event starts.
Invite your Guests
From the Hangout on Air Event page for your practice video, click the Start arrow in the middle of the video to start your practice video. This will bring up a screen where you can invite Guests. These are people who will actually participate in the video as members of your panel.
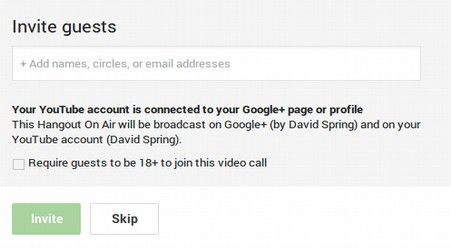
Thankfully, Google allows us to practice making Hangout on Air videos without actually having any guests. So just click Skip which will take us to the “Green Room” where we can learn more about how to create a Hangouts on Air video. It will take about 30 seconds for the video to load. When it is ready, a small green box will appear at the bottom of the screen letting you know you are ready to start broadcasting.
It is best to invite your guests to arrive at the video green room at least 30 minutes before the video broadcast actually begins. The following notice should appear on their Gmail Inbox page.
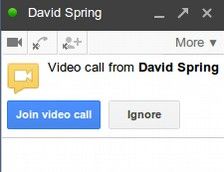
If they are having trouble finding the invitation you sent them, copy the link in the browser screen and email the link to them. It is useful to have an email address and phone list of all guests so you can contact them if they are not there. Whether your Guest responds to the Invitation or clicks on the link in the email you send them, they will see the following screen.
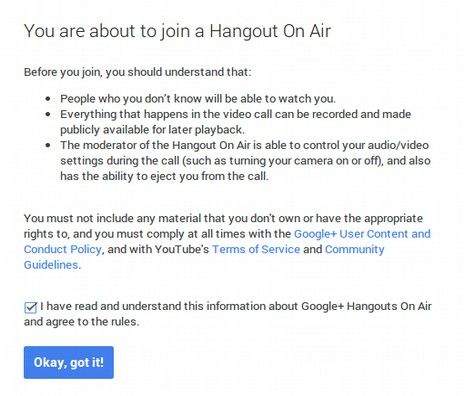
After your Guest clicks OK, they will get one last screen warning them that they are about to go on air.
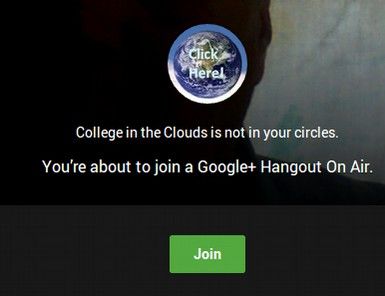
Once they click Join, they are taken to the Green Room where they will see thumbnail images of the host and any other guests that are already at the video conference. Hopefully, all of your guests will arrive well before the video conference starts as there are several last minute details that need to be taken care of in the green room.
Green Room Preparation Tasks... Things to do before your start broadcasting
Before you click on the Start Broadcasting button, make sure that all of your guests have joined the conference call and are ready to start the broadcast. Before starting the video, it is helpful to coach the participates on how to add the Hangouts Toolbox to their end of the conference call so that they can add their name and title in a caption under their image.
If you have more than one guest, it is a good idea to introduce the guests to each other. It is also a good idea to go over what will happen once the video starts and what the agenda or outline is for this particular video conference. This will help your guests stay on topic. You can click on each guest so that they can each see how they look on screen. If they look dark, encourage them to get a small lamp to set next to their computer. Even changing their computer position and camera angle to reduce back lighting can help greatly. If their camera appears to be looking up at them, encourage them to get a couple of books or a small box to place under their computer in order to raise the camera so it is at least at their eye level. If there is a lot of noise coming from their computer fan, see if your guest has a headset and/or microphone they could plug in to reduce the background noise. Alternately, coach them on how to keep their microphone turned off unless they are speaking.
Also let folks know that the video quality of Hangouts on Air is not that great. If they move around a lot or make a lot of hand gestures, these will make the screen very blurry. A little bit of motion is okay. But a lot of head motion would not be good. Finally, make sure everyone has turned off their cell phones and let them know there will be a ten second count down just before the video starts. This is a lot to remember, so you may want to print out a written checklist like the following.
Green Room Checklist
| Tasks before clicking Start Broadcast |
Done? |
Comments |
| All Guests have been sent an invitation. |
||
| All Guests have been sent a link |
||
| All Guests have arrived. |
||
| All Guests have created a Lower Thirds Title |
||
| All guests have been introduced. |
||
| All guests know the topic and agenda. |
||
| All guests have reviewed their camera appearance |
||
| Back lighting of all guests checked. |
||
| Camera angle for all guests checked. |
||
| Background noise level for all guests checked. |
||
| All guests warned about excessive head motion. |
||
| All cell phones are off and all are ready to start the LIVE video? |
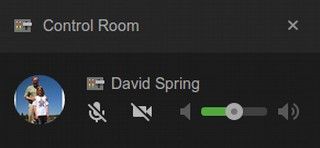
If you still have time, you can also click on the Control Room icon in the left side menu to get familiar with that. The Control Room allows you to turn off the microphones of anyone who you do not want speaking at the moment. This is very handy if someone has a computer with a loud fan or a lot of background noise.
You may also want to become familiar using the “Cameraman” app” (an app not available for a simple Video Hangout). This controls who is visible on the screen. Also, if you have directed folks to watch on your website, you should embed the video code in your website before the video recording begins. It will then appear and stream live on your website.
Start your Live Broadcast
When everyone is ready, or to continue practicing on your own, click the Start Broadcast button. This will bring up the following message:
How long should your Hangout On Air video conference be?
The above message says that you can broadcast for up to 8 hours. But you should limit presentations to no more than 60 minutes as this is the limit of most folks attention span.
But the actual length should also be related to the number of guests you have and the number of topics you want to cover. If you have a single guest you are interviewing about a single topic, then 10 minutes may be long enough. However if you have 9 guests, and you want to allow each of them 6 minutes to talk about the same subject, then you will need an hour. If you have a lot of guests and or a lot of topics, you should consider making separate videos for each topic and bring in smaller panels of guests such that there is never more than 9 guests. This will allow viewers to choose the videos that are about the topics they are most interested in. You can let folks know the expected length of the video at the time you create your Hangout on Air Event.
Click OK to start the actual recorded conference. There will be a count down of about five seconds and then the video will be live.
Begin every video with an introduction of guests and topics
Some tips on conducting a Video on Air include first introducing yourself and the purpose of the video. Then have your guests briefly introduce themselves (or you introduce them.). It also helps to have an agenda and to appoint someone to organize and report questions from members watch in the live audience. If you are going to use any tools, such as screen sharing or sharing documents with Google Drive, practice using them before the phone call in a simple video call to make sure they will work and be readable in the actual Hangout on Air.
What about allowing viewer comments and questions during the Live Recording?
There is a Comments tool inside of the Hangouts Toolbox called Comment Tracker. This can pick up comments posted to your Google Plus page or YouTube page for the video event. If you have a large audience and you want to encourage them to participate by asking questions of your panel, this may be a useful tool. However, it is also very inefficient as new arrivals may ask questions that have already been covered many times in previous videos. A more efficient way to handle questions is to ask that questions be posted to your website forum. A forum is a very powerful tool because it forces the person asking the question to put it into a particular subject category. When they get there, they can read the questions of others and perhaps discover that their question has already been asked and answered.
In addition, if it is an important question, it can be answered on the forum and others who come later with the same question can benefit from this – even if they never saw the video that prompted the question.
Finally, having the audience ask questions can disrupt the focus on the topic as many questions are not related to the topic being discussed on the video. For all of these reasons, it is generally better to set up a community forum than to use a comment system during a live video. Just be sure to add information about how to get to your community forum to your video and/or image trailer and closing clips. This way, the audience can post questions on your forum even before the video starts – or after it ends.
End each Program with a Call to Action
Once you are done discussing your topic with your guests, you want to let the audience know where they can learn more about the topic including visiting your website and any websites of your guests. You also want to encourage the audience to subscribe to your YouTube channel so they can get notices about upcoming videos you will be doing. Let the audience know about the time and subject of your next video. It is good to post to your video channel on a regular basis such as a weekly wrap up every Friday afternoon. Let's folks know if this video is part of a series of videos and where they can post questions or comments.
If you have an email list, let the audience know how they can sign up for your email list and about how often you send out newsletters to this email list. Also ask the audience to share the link to this video with their friends and neighbors. Finally, thank the audience for taking the time to watch your program. In a later article, we will review how to add introductory and closing sound tracks and clips to your videos.
An Easy Way to Add an Ending Image
While you can add an image or video clip in the editing process after creating your video, it will not be seen by folks who watch the video live. A simpler and perhaps better process is to prepare your closing image ahead of time and then when your show is over, click on the Google Screenshare app and then display your closing image for a few seconds – while muting the microphones of all guests. Then click Stop Broadcast.
Ending the Broadcast
When you are done practicing, click Stop Broadcasting. You can then finish talking with and thanking the panel members for their participation and encouraging them to invite their friends to visit your website or YouTube channel and watch the video. When you are ready to end the non-recorded portion at the end of the video conference, click on the Red Phone icon to end the call. You will then see the following message.
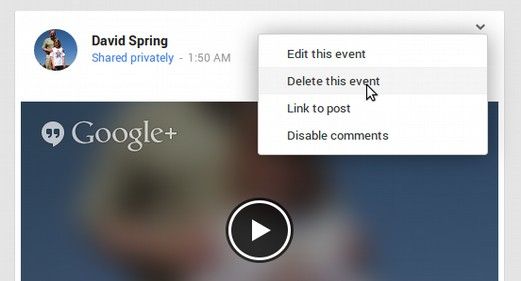
You can click on the blue YouTube Video Manager link to go directly to your YouTube page. Or just click close and go to your YouTube Channel page by another route. If this was just a practice video and you want to delete the event, go to your Home page and hover your mouse over the upper right corner of the video post. A small drop down arrow will appear. Click on it. Then click on Delete this event.
While the event is gone, there is still a practice video in your new YouTube channel. In the next article, we will review how to set up your personal YouTube channel and do some simple editing of your video before you post it to your new channel.