
First, we will describe how to use a video screen capture tool called Simple Screen Recorder (SSR) to record our computer desktop or any part of our desktop. This method is used primary to demonstrate how programs are used. Second, we will describe how to use a tool called GUVCView to use a video camera (inside or connected to our computer) to create a video. This method is used to create a video of you looking into the camera – the “talking head” kind of video. Third, we will describe how to use SSR and GUVC together to create a video that captures both the desktop and talking head in a corner of the desktop.
In later articles, we will explain how to use an external camera to take real world videos and “green room” virtual videos. But for now, let's get started with installing and using Simple Screen Recorder.
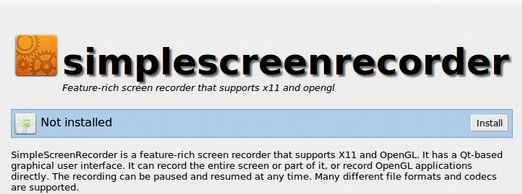
How to use Simple Screen Recorder to Create a Desktop Video
Our assumption is that you have read our previous tutorials on how to add the free Linux Mint operating system to your computer. A huge advantage of this program is that it comes with the option to install up to 60,000 other free open source programs just by opening the Mint Software Manager from the Main Menu. One of these programs is called Simple Screen Recorder (SSR). To install it, from the Mint Software Manager, just type the word Simple Screen Recorder into the search box. Then click on Simple Screen Recorder. Then click on “Install.”
Then close the Mint Software Manager. There are two other very popular free Linux Mint video screen capture tools. These are called Record My Desktop and Kazam. But Kazam has a problem recording a selected area of our desktop. As this is the primary method we will use to record videos, this makes Kazam a bad option. Record My Desktop has problems displaying properly with some computers and tends to be too complex for many users. In addition both Kazam and Record My Desktop output videos in a file format that YouTube does not like. Simple Screen Recorder recorders videos in the YouTube favored file format called MP4. This eliminates the need for file converters and results in a simple high quality video that can be directly loaded into YouTube or any video editing program.
To open Simple Screen Recorder go to the Mint Menu and click on Applications, Sound and Video. Right click on Simple Screen Recorder and drag it to your desktop or your Task Bar. Then click on the SSR icon to open it.
Click on Continue at the bottom of the Intro screen to get to the first of three very well organized settings screens.
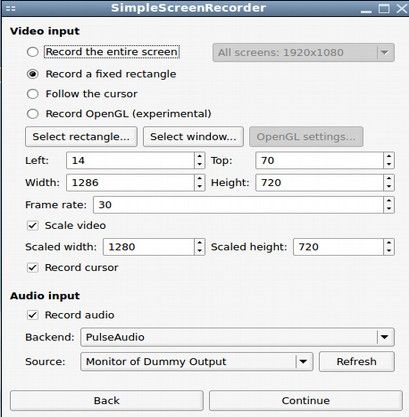
It is common to record the entire desktop screen. However this results in videos that are very difficult to see as the desktop is compressed from 14 inches to 4 inches. We therefore recommend that you select “Record a Fixed Rectangle” and that you select a rectangle on your desktop that is about the same size as the YouTube 16×9 screen. Get the screen to about 1280×720 and then check “Scale Video” to make the final recording exactly 1280 by 720. This will allow you to more precisely predict was the final video will look like on YouTube.
The left and top settings shown above indicate how far your selected box is from the left and top of your computer screen. I always keep my selected screen in the same place for every video and place a text document to the right of it and the SSR Control Panel below the Text document. The text document can be a reminder of what you wanted to talk about during the video recording. It is near the camera lens. So you can look at it and still be almost looking into the camera. Below is an image of the complete desktop with the video box in the upper left, the headshot controlled below it, the text box in the upper right and the SSR Control Panel below it.

We will explain how to install and use the GUVC headshot program in the next section. But first, we need to review how to set up the all important sound for your video.
Audio or Sound Microphone Input
The SSR Audio Input Source is set for Monitor of Dummy Output. This means your computer microphone. If you have a traditional computer with a fan, you should not use the computer microphone as the sound on YouTube will be terrible. Instead, you should get a separate headset with its own microphone and attach it to your computer with a USB. You can then use the drop down arrow and select Headset Mono.
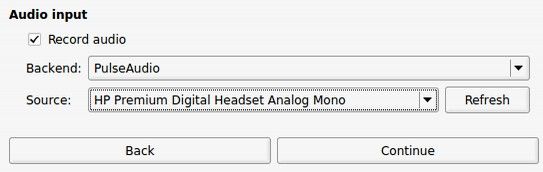
There is also a headset stereo option. But it does not seem to work. If you do not see the headset option or sound on your video did not capture, try restarting SSR with your Headset already in the USB port. Also check your computer's Control Panel “Sound” settings to make sure the headset is recognized and active. You will likely need to change the settings on your computer to direct the sound through your Microphone. With the headset and microphone attached to your computer, click on the Mint Menu and then the Control Center. Then click on Hardware, Sound.
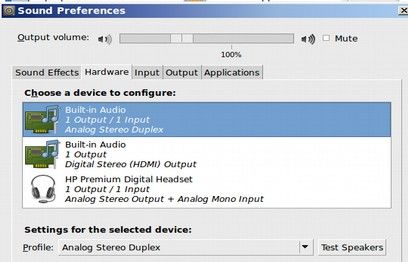
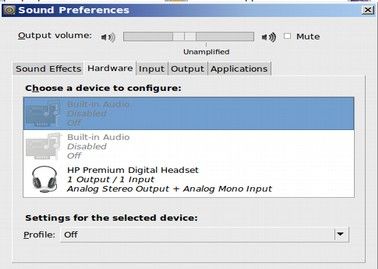
Click on the Hardware tab. One of the default speakers is set for Analog Stereo Duplex and the other is set for Digital Stereo HDMI Output. Turn off both of the built in speakers as shown below.
Then click on your attached Headset and set it for stereo output and Mono input.
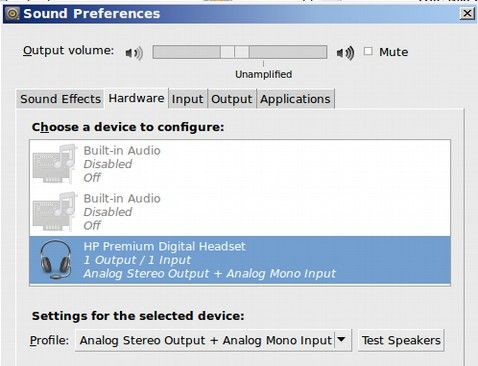
Slide the sound output volume up to near the Unamplified mark.
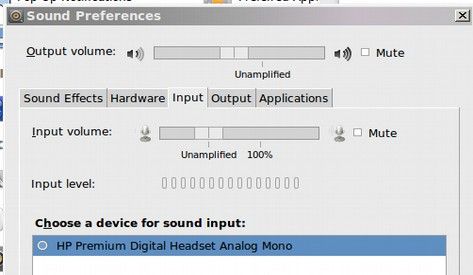
Then click on the Input tab. Make sure your headset shows and is selected.
Then click on the output tab and make sure your headset shows here and is selected. Finally, make sure the Input and Output volume is set for the near the top of the range. Then close the Mint Sound Preferences. The go back to the SSR first settings screen and verify these are set correctly and click continue to reach the second of three settings screens.
Set Container and Video and Audio Codecs
This is the second SSR settings screen.
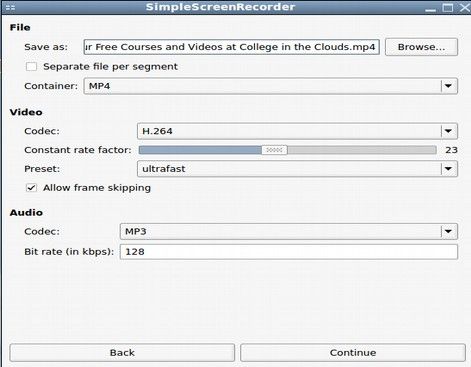
Type in a short file name for your video. This will place the video in your Home folder. If you check the box for “Separate file per segment” this will create a new file every time you pause the video. The drawback of checking this box is that you would then later need to use a video editing program to put all of the files back together again. If you want to be able to pause the video recording without creating a new file, leave this box unchecked.
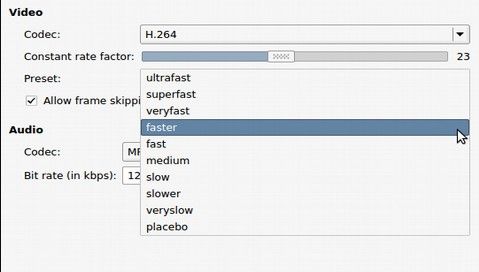
If you will be doing YouTube videos, then change the container to MP4 and YouTube will love you. For the video codec, H264 with ultrafast results in the best quality video. However, it also results in a very large file size. This is not a problem if your video is under 5 minutes long. But if your video is over 5 minutes, then consider changing the preset to very fast or just faster.
You can also lower the frame rate on the first settings screen to 24, 20 or even 15 frames per second for really long videos.
For the Audio Codec, leave it set at MP3 and a bit rate of 128. The audio does not have much of an effect on file size. Then click on the Continue button at the bottom of this screen to reach the third and final SSR settings screen.
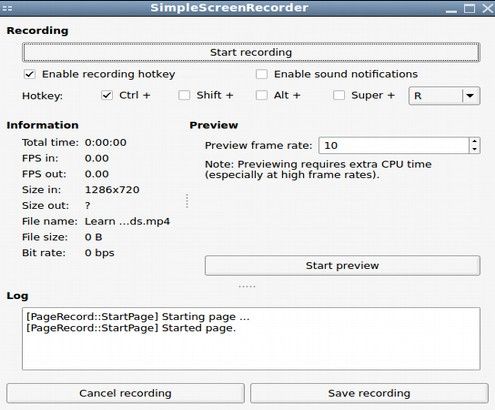
The only thing you need to do here is click on the Start Recording button to start the video. Do not worry if you make a mistake, just click on the Pause Recording button to stop the video and then click the cancel recording button to cancel the recording. Then when you are ready, click on Start Recording to start over. When you are happy with the recording, then click on Save Recording to place it in your Home folder on your computer.
It is not really necessary to edit a video to watch it on your computer or load it to YouTube. Just go to your File Manager to verify that the file is there. To view the video, download another free program called VLC Media Player from the Mint Software Manager (it may already be installed). Then open the VLC Media Play and click File Open to open your practice video.
If you notice a lot of noise, or no sound at all, try changing your microphone settings and/or the settings on Mint Sound Preferences. The first time you run SSR, you may have to install an extra set of packages to get H264 codec support. To get these, go to the Mint Control Panel and click on Synapic Package Manager. Type libavcodec into the search box. (This stands for Library AV Codec). You want to install the one marked libavcodec_extra.
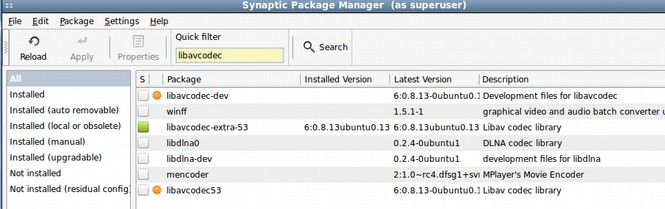
Just check the box for this program. Then click Install. This will also remove some of the unneeded codecs. We next will work on using GuvcView to record a video with our computer's built in or attached camera.
Record you Face with GuvcView
Historically, folks used a free program called Cheese to record their face. However, Cheese has lots of problems. In particular, it is impossible to streamline the extremely boxy and cluttered headshot window. We will therefore use a newer program called GUVCView to record a video of us talking. You can download GuvcView by going to the Mint Manager and typing GuvcView into the search box. Then click on the Install button.
The U in GUVC means that this device picks up any video camera attached to your computer with a USB (in addition to the internal computer camera). So not only can you record events with an externally mounted USB but even import to your computer directly from a camcorder attached to the computer with a USB.
To open GuvcView, click on the Mint Menu, then click on Applications, Sound and Video. Then right click or drag the GuvcView Icon to the desktop and click on it to open it. If your camera is working, you will now see you face it the small Window. You can make this window bigger or smaller and move it anywhere you want on your desktop. Move it out of the way so you can take a look at the GUVCView Control Panel hiding behind it. By default, it opens at the Image Controls tab.
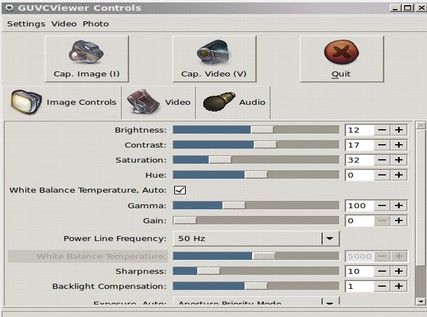
The one important setting here is Brightness. You can make the View screen brighter by clicking on this. But it would be better simply to get better lighting in the room where you are taking your video.
Next, click on the word Video to open the Video tab.
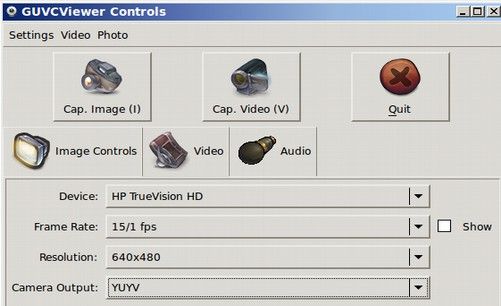
This allows you to choose the camera if you have more than one hooked up. You can also set the frame rate which should be set for 15 to 30 frames per second to match our Simple Screen Recorder (SSR) settings. You can also set the resolution which should be set for 640×480. For the camera output setting, the default is MJPG. However, this setting typically does not work. We have therefore changed the setting to YUYV.
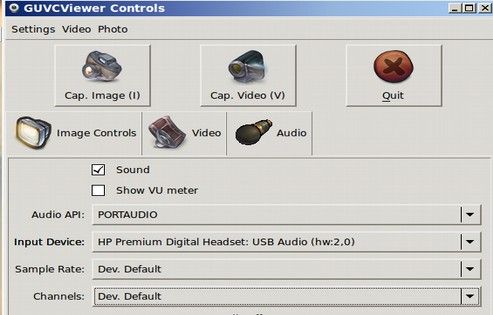
Next click on the Audio tab. Getting sound to work can be a challenge. But the following settings should work assuming you are using an attached headset with its own microphone.
Next, click on the Settings, Camera button in the top menu and make sure it is set for Capture Video (and not Capture Image). Then click on Video, Video Codecs and set this for MPEG 4.
To start the video, click on Cap Video. There will be no warning and the GUVC Control Window will not disappear. The video will simply start and capture whatever the camera sees in the Window – which will hopefully be you. Move the Window close to the camera so that you can look at the recording Window and look into the camera at the same time.
As with video conferencing, it is best to have a lamp by your computer to light up your face. Also avoid any back lighting or other distractions on the wall behind you. Finally, consider raising the computer and its camera about a foot above your desk so that the camera on your computer is looking down at you rather than up at you. When you are ready, click on the Cap Video button and start talking so that you can evaluate the sound of your test video. Then click on the Quit button in the control panel to end the video. The video file will automatically be placed in your File Manager folder as guvcview_video1. as an MKV file. Open this video with the VCL Media Player. hopefully, the sound works okay.
Combine SSR and GUVC to create a video with the desktop and headshot
GUVC has an interesting property. It shows your face motion in its recording window even when it is not actually recording! This allows us to place the reduced GUVC window with our face it in in the lower right corner of our desktop and folks can see our face while we are showing how to use a program with the rest of the desktop. This adds a human touch to our SSR desktop videos as otherwise folks just here us talking. First open GUVC and move the Window to the lower right corner. Resize the GUVC window so that it is pretty small. This will allow the rest of the selected area screen to SSR. Then move the GUVC control panel (leaving it on but not recording) to the bottom of the screen just above the lower task bar. If you are doing a slideshow make sure that there are no important graphics that will be covered up by this image.
Video Window Placement
It is common to place the headshot in the lower right corner of your SSR selection box. However, this means your head may be hidden by the black lower YouTube bar when the video first starts. To avoid this problem, keep the headshot window 20 pixels or about two lines above the bottom of your SSR selection window.
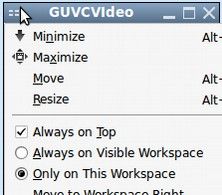
Keeping the GUVC window on top of all your other document windows. As you click through slideshow, you will likely see the GUVC window get hidden underneath this active document. To prevent this from happening, click on the Title Bar at the top of the GUVC viewing window and check the box “Always on Top.” You will need to remember to do this at the beginning of every video.
If you want to make the text in the title bar less noticeable in your video, go to the Mint Control Panel and click on Appearance, Theme, Customize. For controls, select Industrial and for Window Border, select Metabox.
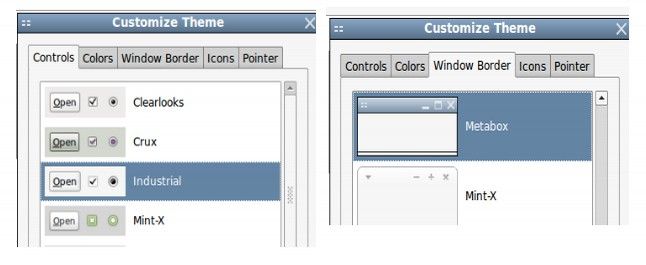
This will result in a small plain white title box appearing above your headshot with no visible distracting text in it when the window is not selected (and it will not be selected during your video unless you accidentally click on it.
What comes next?
This completes our article on Video Desktop Screen Capture. In our next article, we will review how to capture video clips off of the internet to add to our own videos.